Recently many Architects and Designers have been exploring different AI platforms – This is exciting!
Continue the reading…
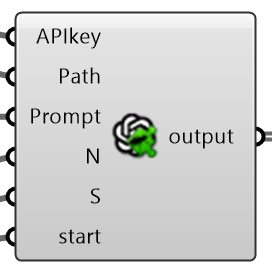
Thanks to Open AI API documentation for DALL-E is it possible to integrate into Grasshopper our “prompts to image” process throughout my component “LA_OpenAI-GH”
Now this component is available on my GitHub page and it will be turned on in the “Extra” sub-category of the Ambrosinus-Toolkit plugin
Useful premises – installation prerequisite steps
1 – I recommend reading this page as could be useful to understand how DALL-E works;
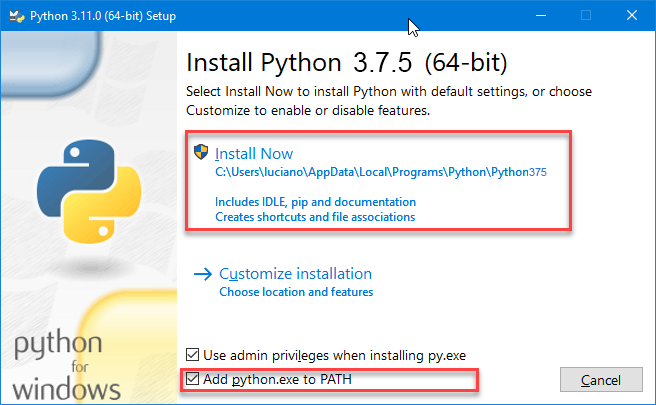
2 – Install the Python release 3.7.5 (this is the version I have tested) – It is really important to accept the default settings and tick this option “Add python.exe to PATH”;
To be more accurate I have installed also the latest version 3.11.0 version on different machines and I had no problem with openai python library, BUT if you want to install also my Grasshopper component for Stable Diffusion AI, please install the 3.7.5 – if you have tried the latest version and no errors occurred, please let me know;
3 – Check your pip installation you should read a list of commands and general options – if it is your case jump to point 4:
Launch the command prompt window:
- Press Windows Key + X.
- Click Run.
- Type in cmd.exe and hit enter.
- In cmd.exe type:
pip help
Sometimes some machines do not have the pip protocol installed (full source here).

If you encounter this issue execute this step:
- Launch a command prompt if it isn’t already open. To do so, open the Windows search bar, type cmd and click on the icon.
- Then, run the following command to download the get-pip.py file:
curl https://bootstrap.pypa.io/get-pip.py -o get-pip.py
4 – Install the “openai” library using the pip protocol via the windows command prompt (cmd.exe)
4.1 – Restart your machine 😉
5 – From Grasshopper side: Super important! install the exceptional GH_CPYTHON component by MahmoudAbdelRahman (the Python with a black icon – check that the files are “unblocked”) – This is necessary for importing the openai library and some others to run my ghuser component;
5.1 – Restart your Rhino
A little issue that I encountered is the syntax of the folder path. Generally, it has this format “C:\Desktop\test_folder” and it works like a charm on several machines; in some cases (which happened on my laptop) you need to replace the backslash ‘\’ with the slash’/’: “C:/Desktop/test_folder”
I have used this procedure above on some machines different from my DEV workstation, just to be sure.
Then…
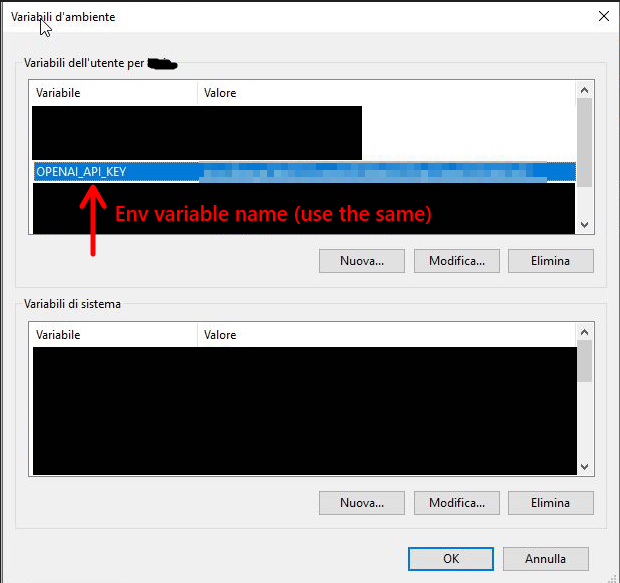
Generate a personal API key from your beta.openai.com account and save it in your window environment variables with this name: “OPENAI_API_KEY”

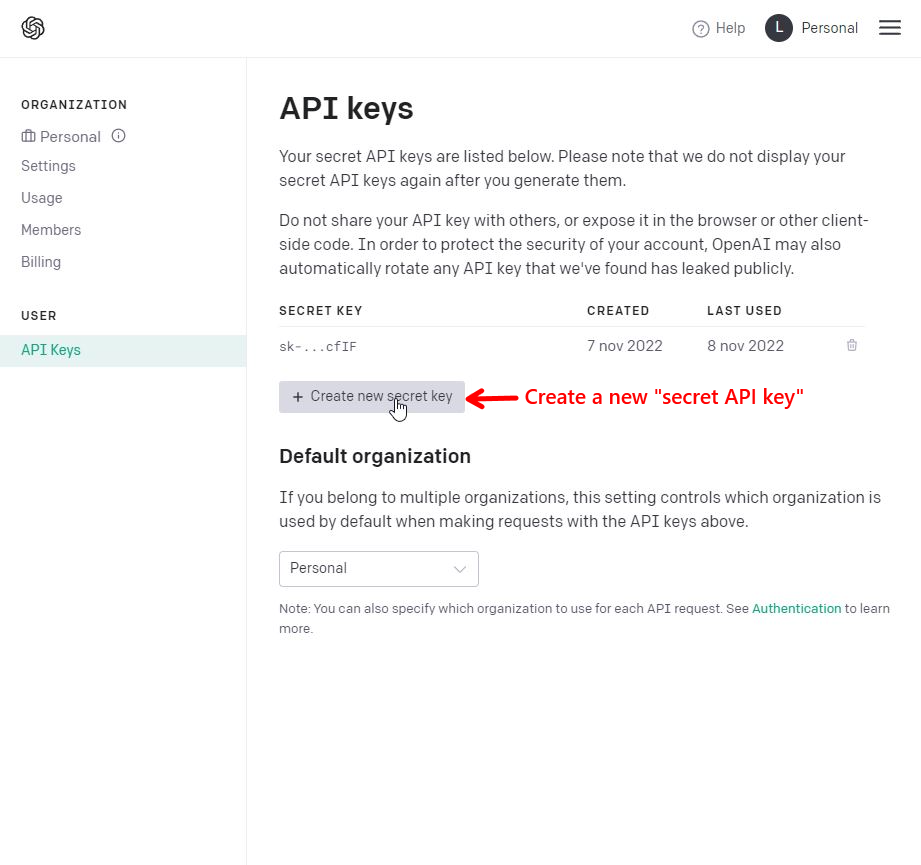
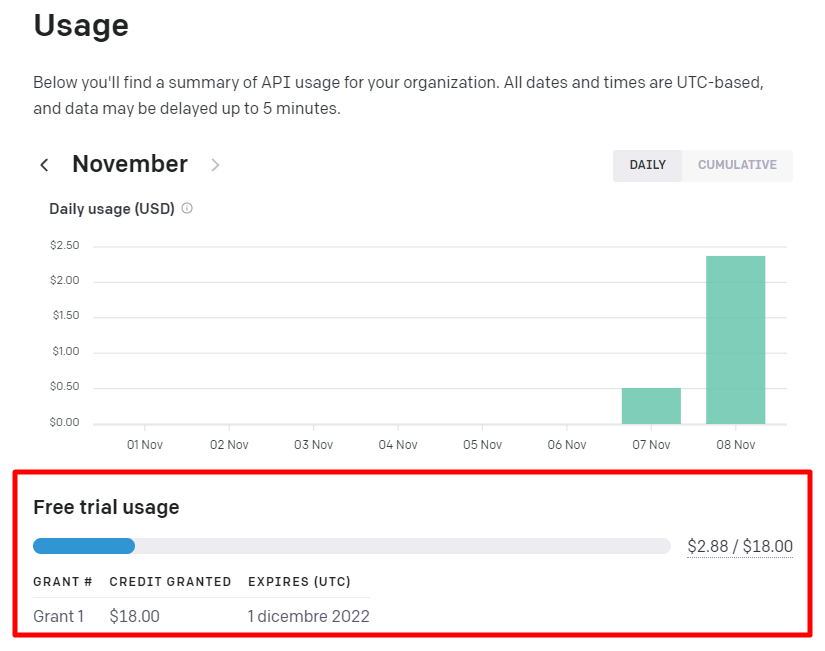
Each creation will take a small amount of your trial-granted credit (at the time I took the last screenshot I have generated more or less 100 images). Don’t share your API key.
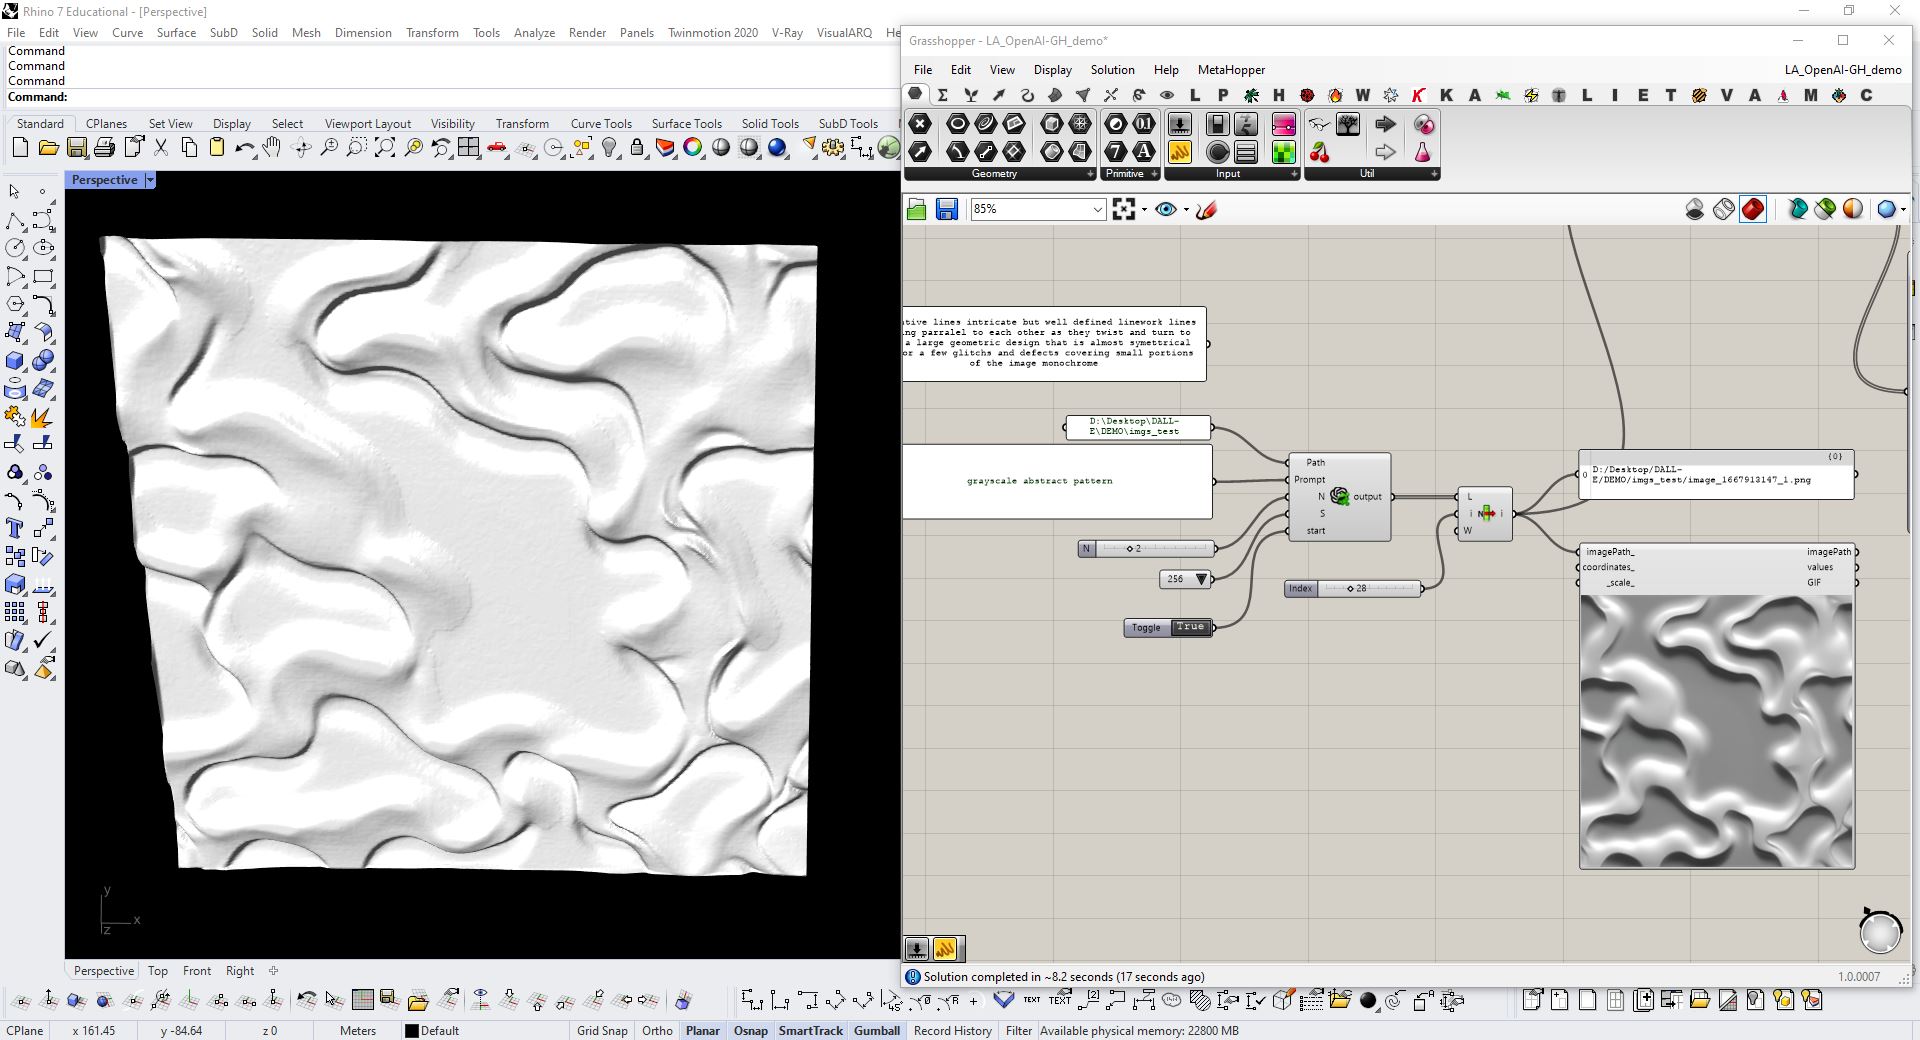
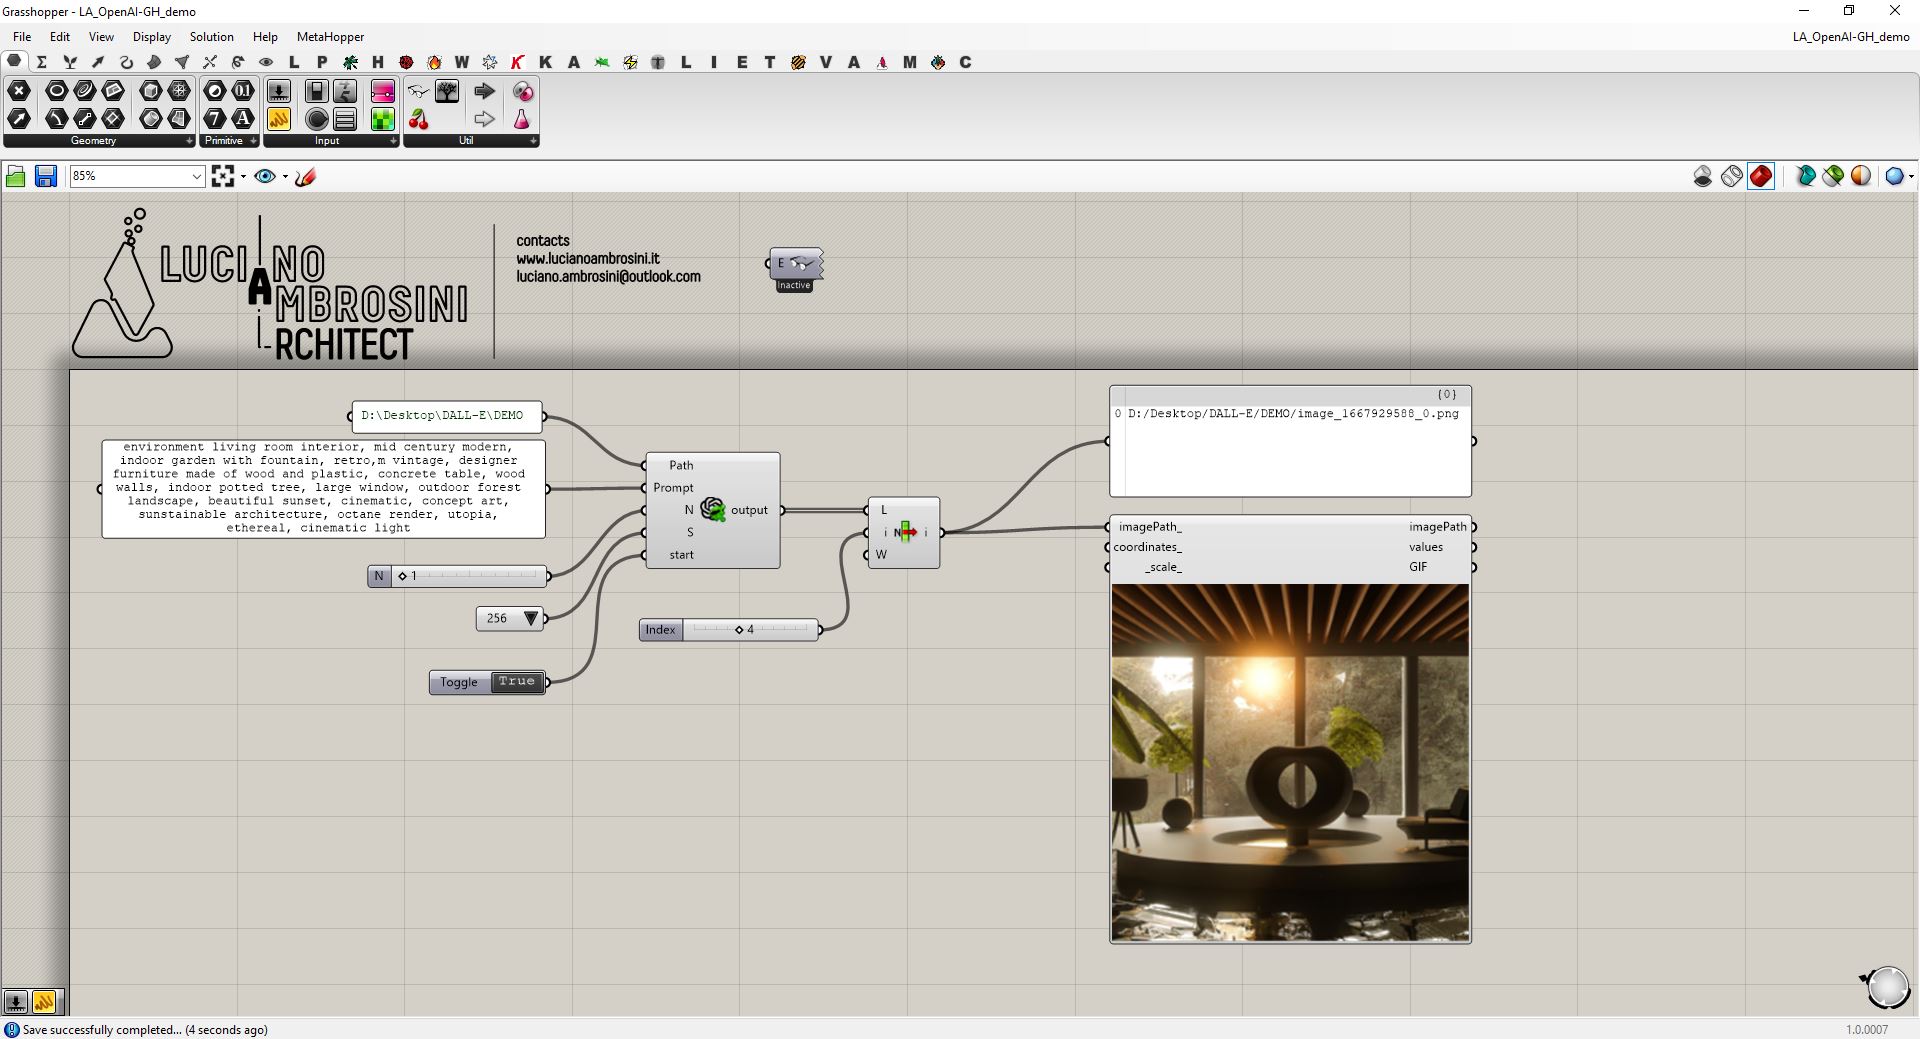
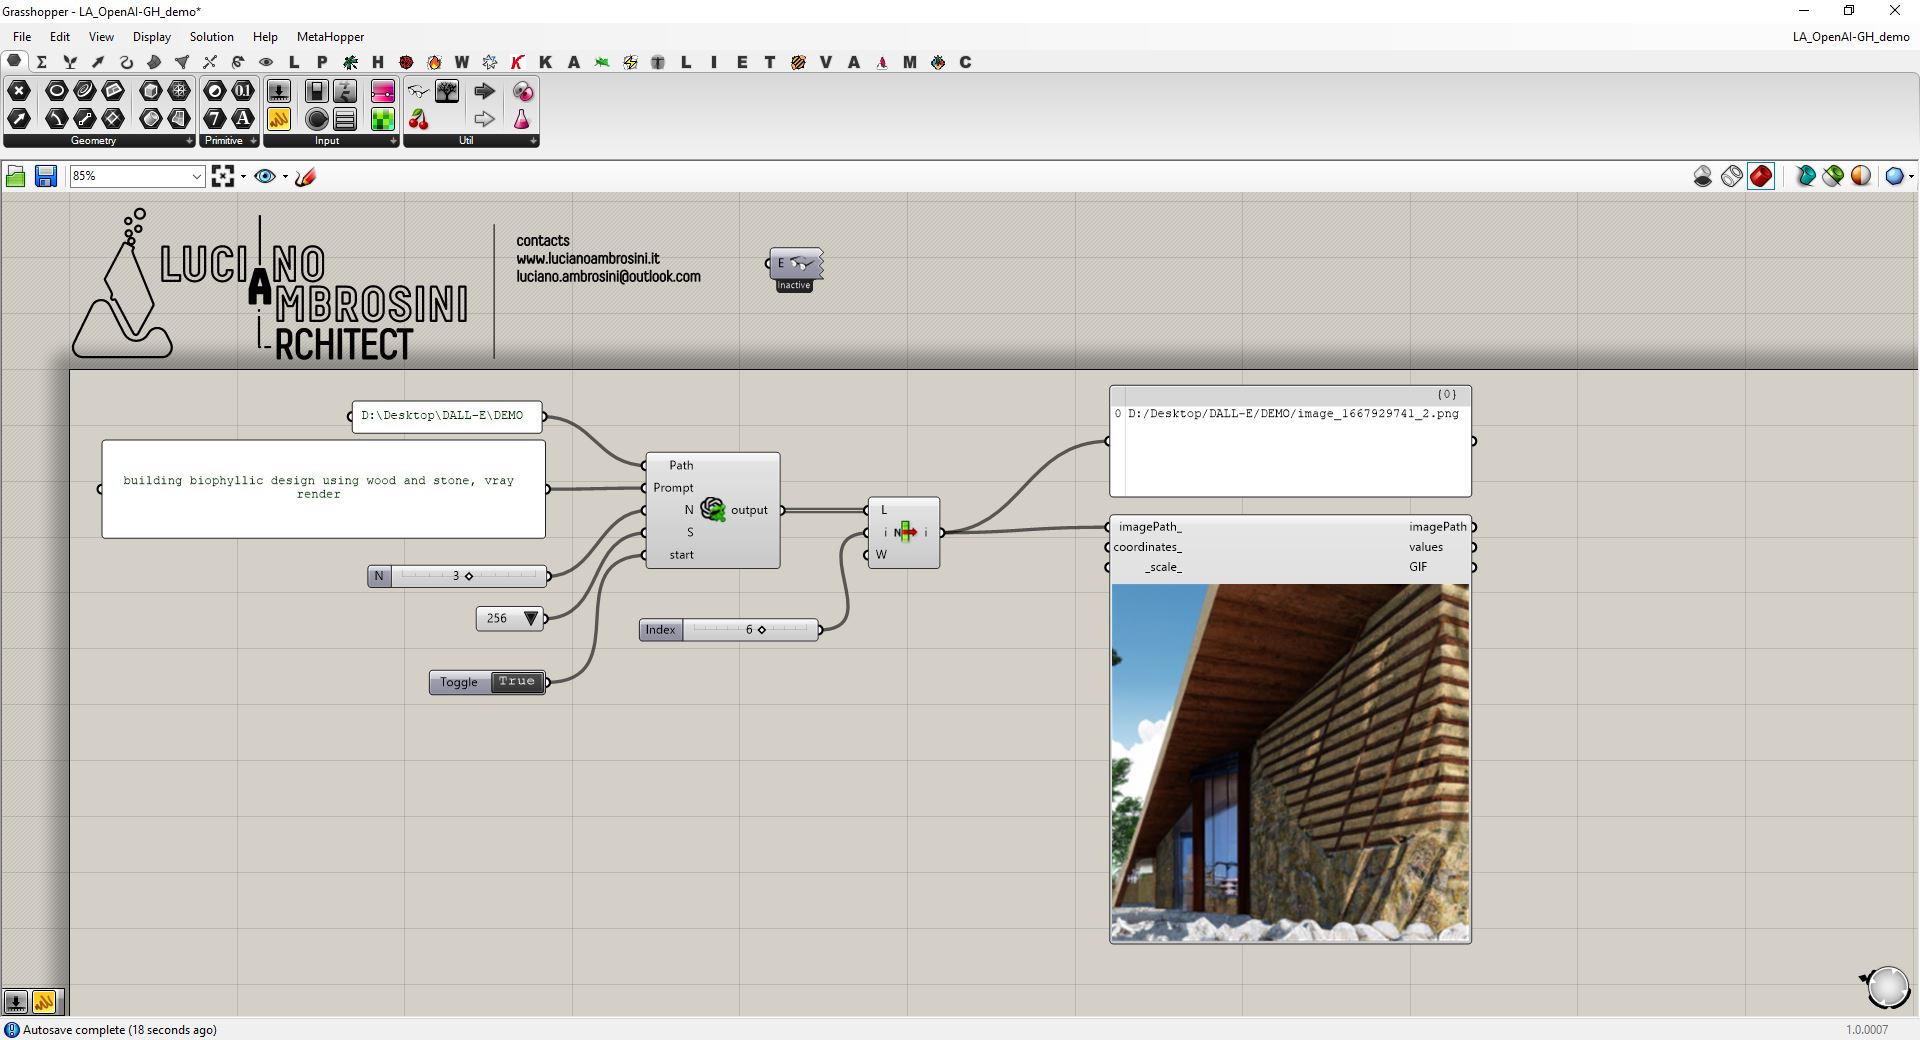
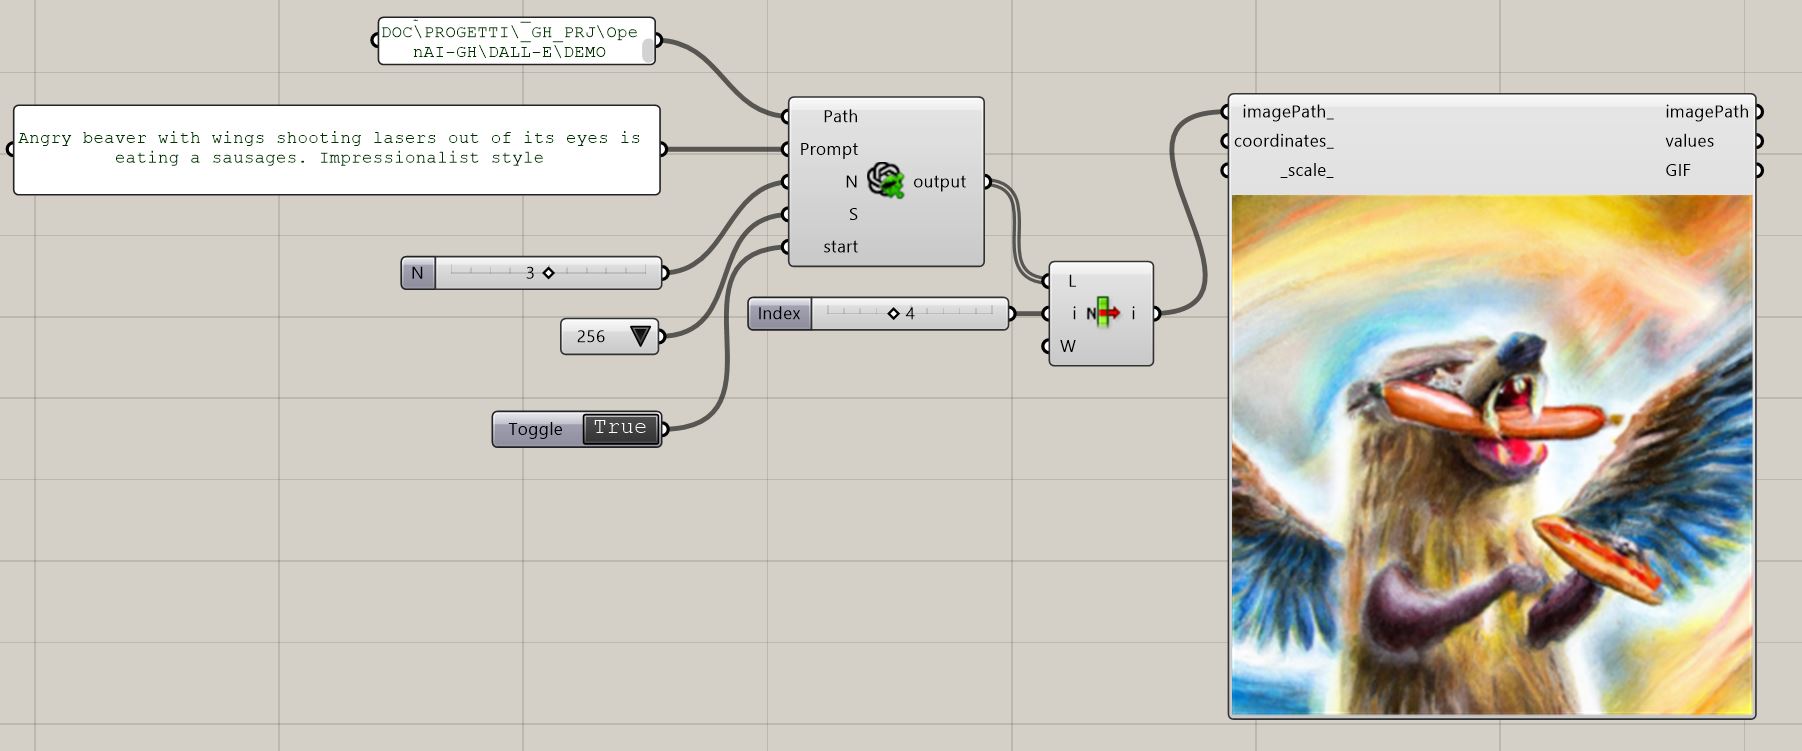
Below is the new component in action:
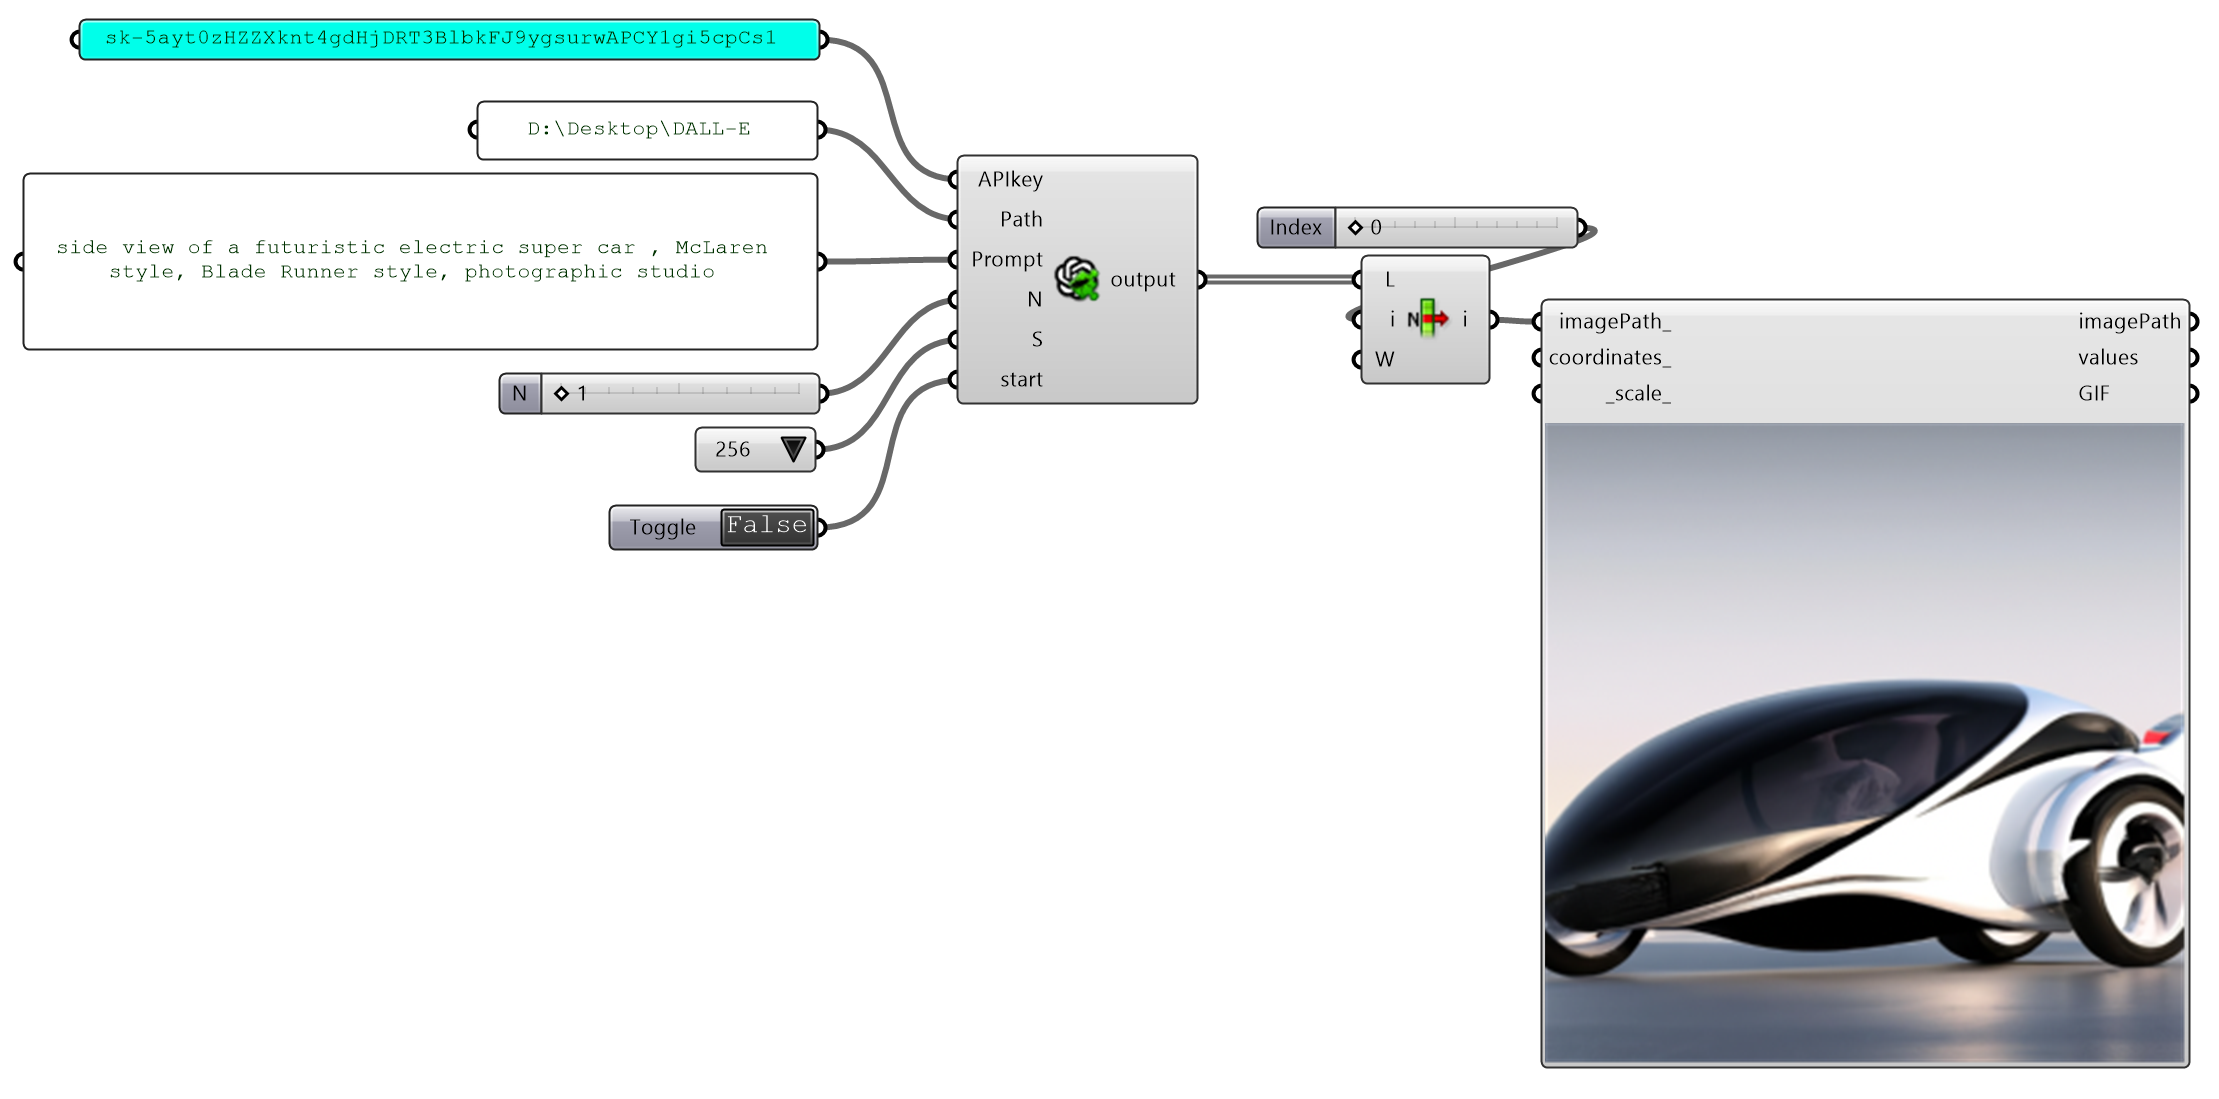
- You need an active internet connection (the image elaboration happens on the OpenAI servers) – So that’s why you need always an API key;
- Now you can save your Open AI API key in the environment variables of Windows O.S. or give it as input as shown above (my demo key has been deleted this is just a demonstration 😉 ) – After you have saved your API key into the environment variables of Windows, restart your Rhino for letting the component reads the key. If you don’t connect anything in the “APIkey” input, the component will read the key stored in your Windows O.S.;
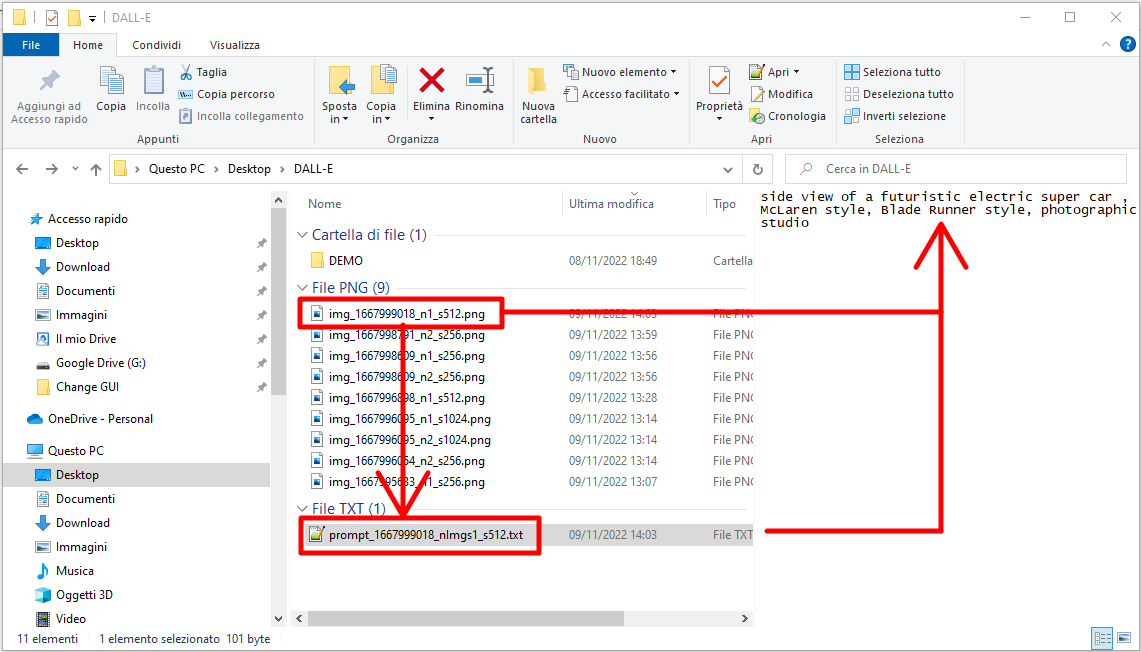
- When the toggle is in the “False state” the component read only the PNG files inside “Path” directory;
- The component generates for each prompt a text file (.txt) where you can read the prompt that has generated a specific image See image below);
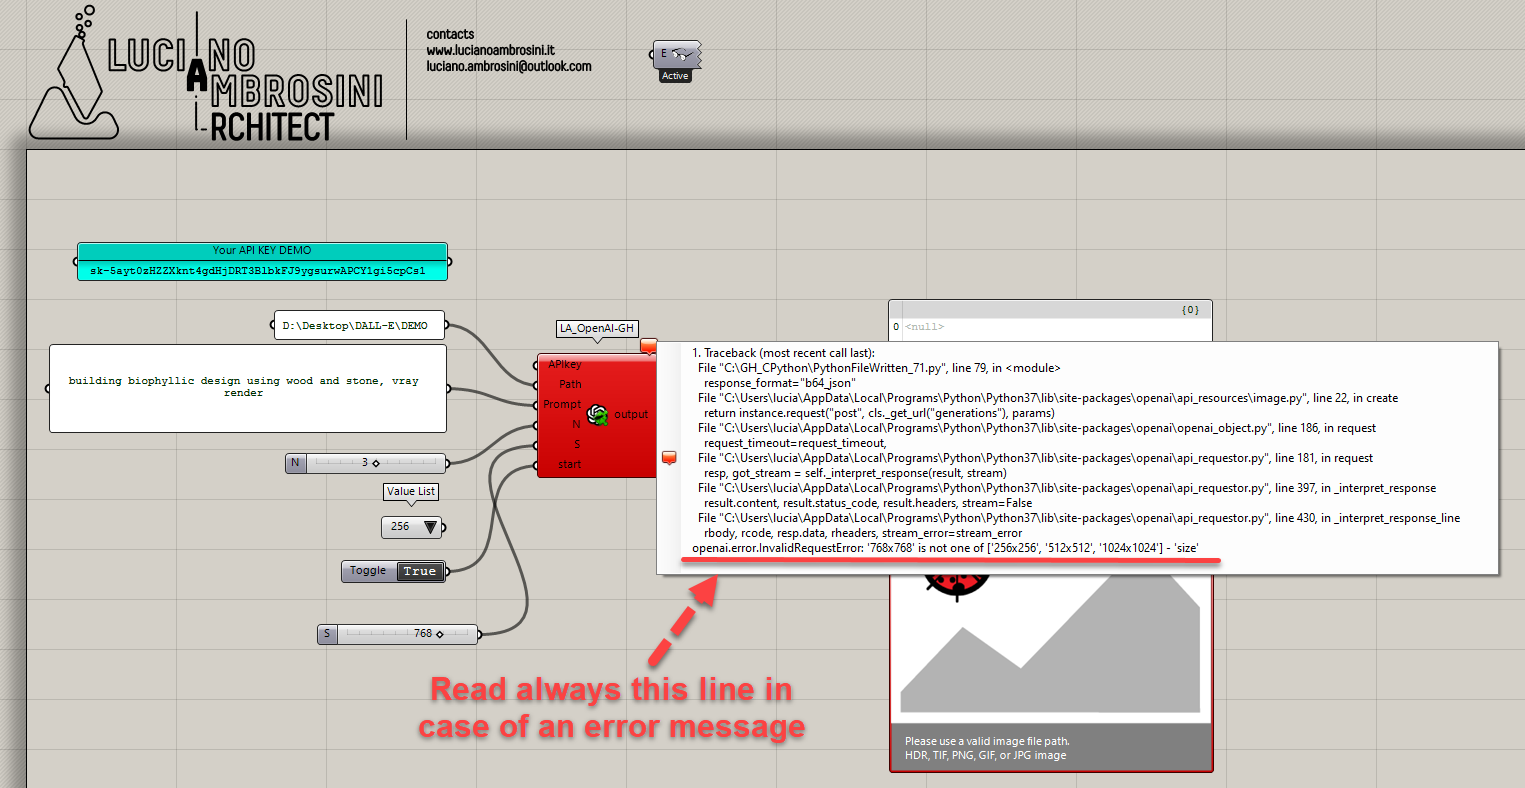
In case of server error such as input error, expired API Key credentials or insufficient credit try to have a look here:
Here below the video DEMO

Download this component from HERE
![]()
