Since the Ambrosinus-Toolkit v1.2.2 has been implemented with a new feature: Run Stable Diffusion locally and above all in remote working! Thanks, AUTOMATIC1111 (A11) project and ControlNET (CN) extensions it is possible to run Stable DIffusion on a “server PC” and then manage/launch AI power directly from a “remote PC” located on the same LAN.
This version has been implemented also with the ControlNET v1.1.X, but my suggestion still remains on using ControlNET v1.0 due to the fact that CN v1.1 doesn’t not have full API support, for now.
This Remote Working feature exploits the “listen” argument already available in the A1111 project and allows users to set a custom port number. Anyway, let me describe the workaround that I have made up (and if some bugs would come up, please let me know 😉). My configuration for this experiment is Server PC as a desktop machine connected to my network by LAN wire and a laptop connected via WiFi to the same LAN.
| New LauncSD_loc component | CustIPport component | AIeNG_loc component | Right-click context Menu |
 |
 |
 |
 |
LaunchSD_loc: now the input parameters give the progression sense of the sequence of the steps. Now you can check the IP address through the integrated ipconfig command helpful when the user ticks the listen argument.
CustIPport_loc: this component helps the user in setting the Remote PC configuration passing the IP address shared on his network and the port number opened on the Windows OS Firewall;
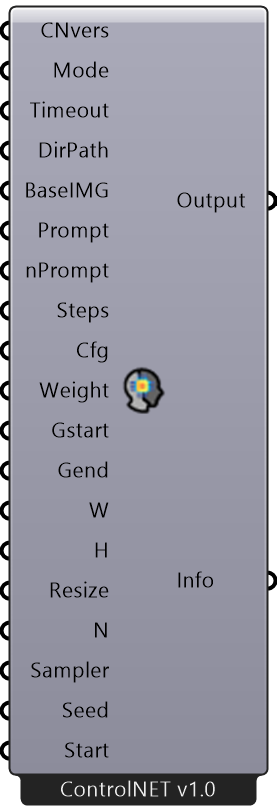
AIeNG_loc: its new look added the implementation of the ControlNET version 1.1.X (bear in mind it is implemented, but not yet fully API supported so I suggest using v1.0) so you can test it but it is already known that the dataset-models do not work properly in the API mode.
How to set the Server PC from Grasshopper
1 – According to the Stable Diffusion & CN version that you want to use, select the correct folder wherein you have installed them and pass this info into the DirPAth parameter of the LaunchSD_loc component (v1.2.2 has a new look!);
2 – Assign a custom Port number for instance 7869 (as shown in the video demo) and be aware that the default one is always 7860;
3 – Remember to tick the listen argument (and always API one) before generating the new WebUI-user.bat file;
4 – Launch the WebUI-user.bat process;
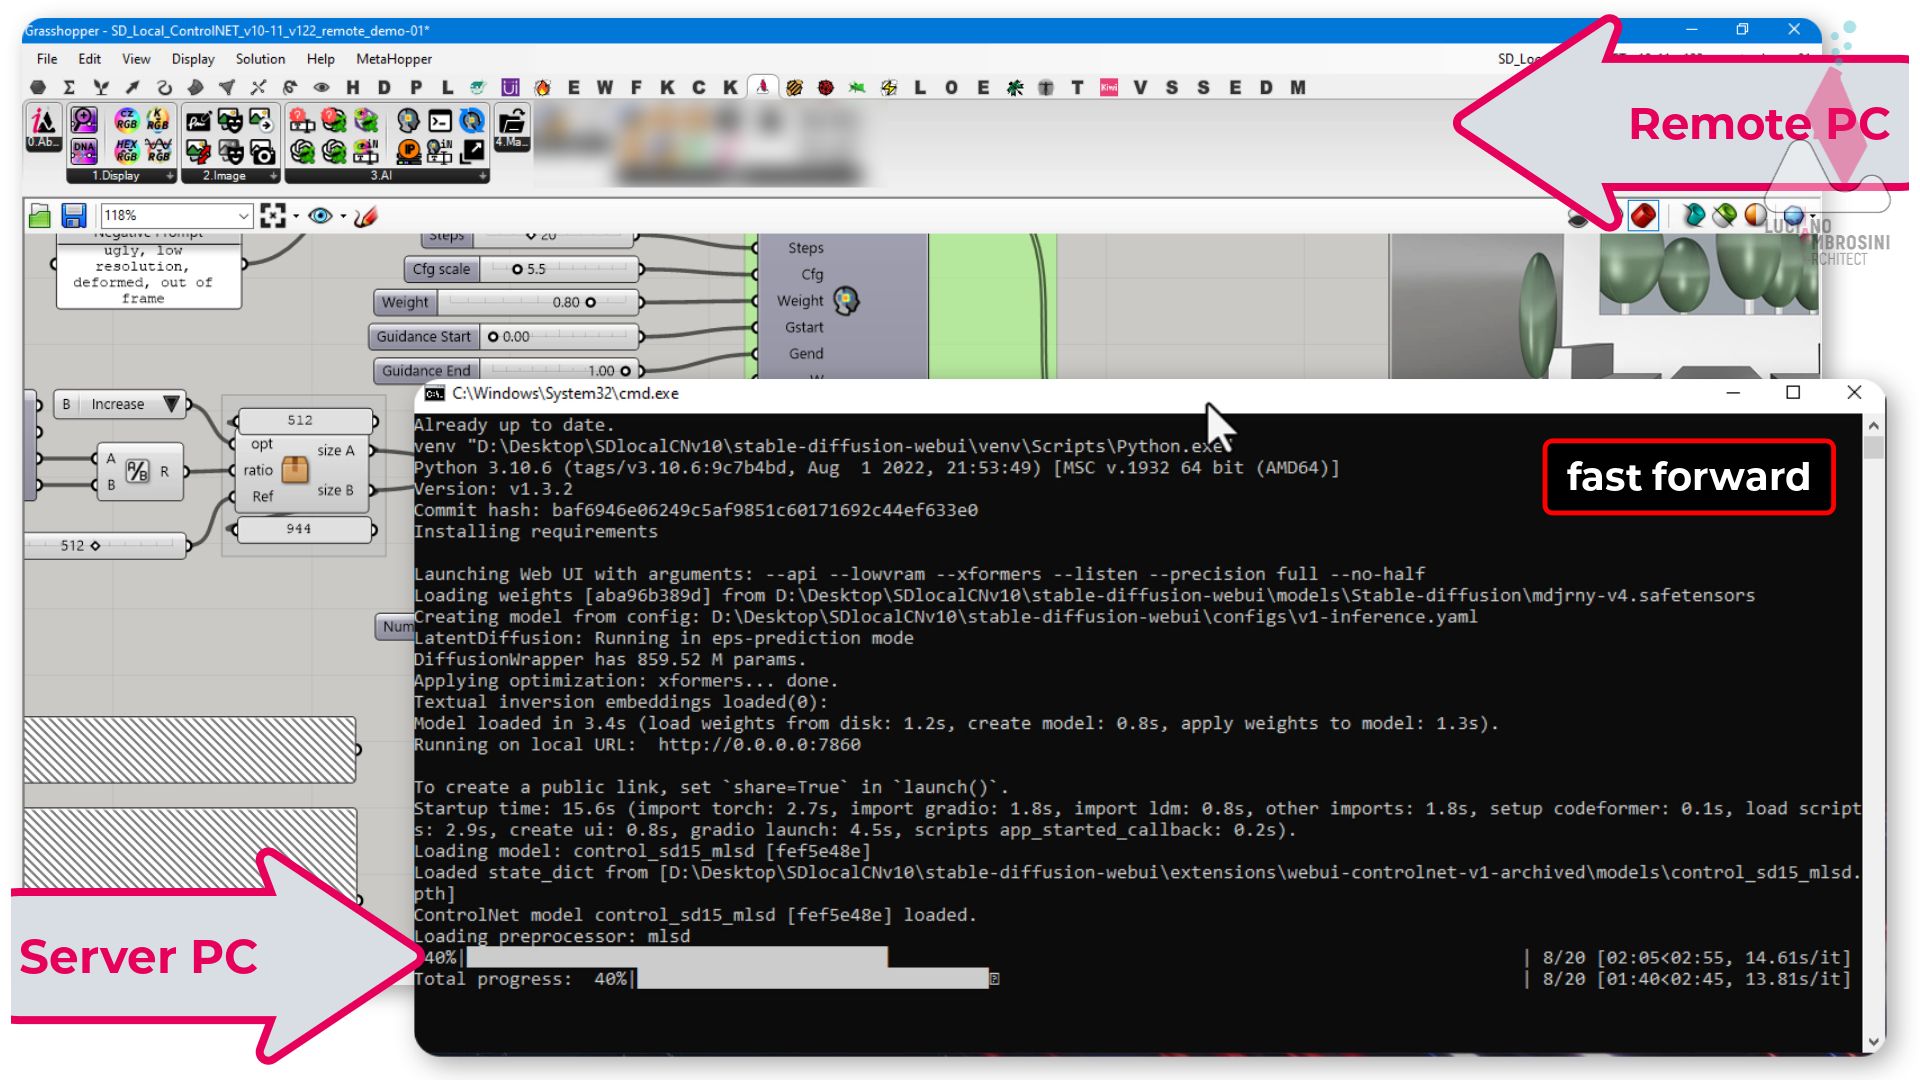
5 – With listen feature ON, you can see this shared IP address and the custom port number given before : http://0.0.0.0:7869 ; now launch ChekIP to launch a classic ipconfig command and take note of the IPv4 address string, for instance in my case it is: http://192.168.1.97 ;
How to open the right Port number on the Windows OS Firewall
You need to make sure that port 7869 is open (or the default 7860). This is one way to open a port easily:
1 – Navigate to Control Panel -> System and Security -> Windows Firewall
2 – Select Advanced Settings and highlight Inbound Rules in the left pane.
3 – Right-click Inbound Rules and select New Rule or select New Rule from Actions on the left
4 – Choose Port and click Next
5 – Choose TCP and enter 7860 in Specific local ports and click Next.
6 – Add the protocol (TCP)and port 7860 into the next window and click Next.
7 – Select Allow the connection in the next window and hit Next.
8 – Select the network types as you see fit and click Next. I enabled all three.
9 – Name the rule something meaningful and click Finish.
Let’s move to the Remote PC
All you need is the CustIPport component without putting on canvas the LaunchSD_loc one.
1 – Text the IP address taken from the CheckIP step http://192.168.1.97 ;
2 – Text the same port that you have already open for the WebUI and on the Windows OS Firewall (7869 in this case)
3 – Use all the other components has already been done before v1.2.2 😉
In the Video demo, you can see the possibility to set a custom checkpoint model like midjrny-V4 (database trained on MidJourney styles) directly from the Remote PC and it is the same for the selection of the upscale models, due to the fact that some components have the ability, now, to read the models list from the Server PC.
An alternative way to set the Server PC through WinSDlauncher from AmbrosinusDEV
In my idea I want to avoid, in some cases, the boring action to switch/fetch the Rhino license between the Server PC and the Remote PC, so I decided to integrate the use of my very first Windows app that simplifies the main WebUI tasks from the A1111 project. WinSDlauncher can open in this v 1.1.3 only the default port 7860 (but stay tuned for the next update!) so it allows the user in setting the Server PC without starting Rhino and Grasshopper, but use them only on the Remote PC.

Is quite obvious from the procedure aforementioned the user can launch Stable Diffusion remotely from his browser and even from his smartphone by simply pointing to the right IP address and port, see the image below 😉

Video
Update Ambrosinus Toolkit to v1.2.2 and download the demo file
from the link below(for Server and Remote PCs)
![]()